Sponsorship Evaluation [IMM 5481] - Net personal income

The third question of the Sponsorship Evaluation [IMM 5481] form requires the sponsor net personal income for the 12-month period preceding the date of the application.

First, what is net personal income?

Net personal income is the money that you keep after the taxes have been deducted. Let’s say you make $80 000 a year. That’s your gross income.

After paying your taxes you end up with $57000 ( this number is just an example). This is your net income.

This question is tricky because you have to calculate the net income in the last 12 month: from the current month going back one year.

I’ll give you an example: let’s say you want to send your sponsorship application on October 1st, 2013. Let’s also consider that you were paid bi-weekly. The table below lists all the payments (after taxes) made to you by your employer in the last year.


Month Number
Month
1st Biweekly Payment
2nd Biweekly Payment
3rd Biweekly Payment
1
October 2012
$2,166.43
$2,166.43
N/A
2
November 2012
$2,166.43
$2,166.43
$2,199.26
3
December 2012
$2,199.26
$2,485.43
N/A
4
January 2013
$2,173.40
$2,173.04
N/A
5
February 2013
$2,173.04
$2,173.04
N/A
6
March 2013
$2,173.04
$2,173.04
N/A
7
April 2013
$2,173.04
$2,173.04
N/A
8
May 2013
$2,173.04
$2,173.04
$2,173.04
9
June 2013
$2,173.04
$2,173.04
N/A
10
July 2013
$2,173.04
$2,173.04
N/A
11
August 2013
$2,207.52
$2,351.59
N/A
12
September 2013
$2,376.59
$2,376.59
N/A

Total: $57,457.92

You will have to sum all the individual payments received in the last year. That is your net personal income.

Finally, the answer to question 3 of the Sponsorship Evaluation looks like this.

Sponsorship Evaluation [IMM 5481] - Net personal income

Sponsorship Evaluation [IMM 5481] - Net personal income
Note that some people have more than one source of income. Some other people are paid monthly (not bi-weekly). What I am trying to say is that the example above is just that: an example. You will need to adjust things depending on your own situation.

I think this post might give you an idea. If so, please, consider clicking Google+ button at the beginning of this entry.

Related Article:
How to get a TTC Excess Fare Refund?

There are situations in which you end-up depositing more money than you should in the TTC bus farebox. It’s quite usual, really, you just forgot your TTC pass and tokens and the only cash in your wallet is a $20 dollars bill.

Something like this happened to me. I didn’t find my GTA Weekly Pass and because I was in a hurry, I deposited my fat $20 box bill in the farebox. This was painful. What’s even worst is that just after the farebox swallowed the green bill, I found the pass. The pass was right there, just in a different place within my wallet.

The TTC bus driver noticed my frustration and told me to wait. He got a yellow paper from his backpack, wrote something on it and gave it to me.

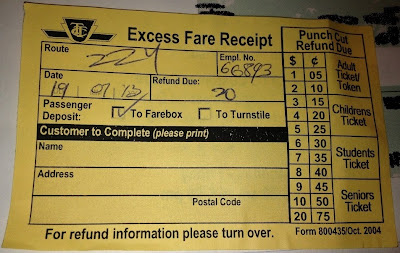
To my surprise it was a TTC Excess Fare Receipt, which allows you to get a refund for the extra money you deposited. I didn’t know such receipt existed. These are pictures of the receipt (both sides) that I took with my phone:
TTC Excess Fare Receipt Front Side

TTC Excess Fare Receipt Back Side

Now, how to get the money back?

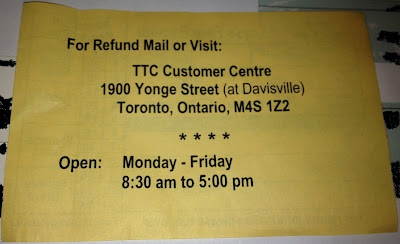
Quite simple: I just wrote my full name and address in the front side of the receipt and emailed it to the address in the back of the receipt. The address in the back of the receipt is this:

TTC Customer Centre
1900 Yonge Street (at Davisville)
Toronto, Ontario, M4S 1 Z2

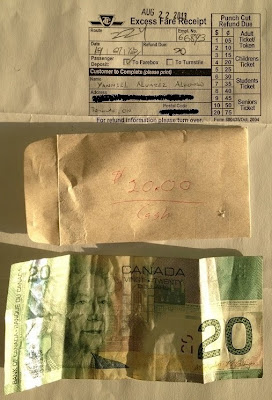
Two weeks later I received a letter from the TTC with my $20 dollars refund in cash. That was unexpected: I was actually expecting a cheque, not cash over regular mail. Take a look at what I received from the TTC.
TTC letter containing Excess Fare Refund
TTC Excess Fare Refund in Cash
Either way, I got my money back. If you find yourself in the same situation now you know what to do.

Proof Fine Silver Dollar - 100th Anniversary of the Canadian Arctic Expedition (year 2013)

The coin

This proof silver dollar is certified to be 99.99% pure silver with a diameter of 36.07 millimetres and a weight of 23.17 grams. Designed by Canadian artist Bonnie Ross, the reverse image draws on photography from the Canadian Arctic Expedition, depicting a group of three men aboard a dogsled, the waiting dog team before them listening for the command to move on across the Arctic tundra. The skyline and horizon behind this portrait are filled with stylized image of a compass. The obverse features the effigy of Her Majesty Queen Elizabeth II by Susanna Blunt.

Proof Fine Silver Dollar - 100th Anniversary of the Canadian Arctic Expedition - Mintage 40000 (2013) [Front]

Proof Fine Silver Dollar - 100th Anniversary of the Canadian Arctic Expedition - Mintage 40000 (2013) [Back]

Mintage/Tirage

12866/40000

Certificate of Authenticity

This 2013 silver dollar is proof quality and is authorized by the Goverment of Canada. The coin has been expertly struck by the Royal Canadian Mint and has a limited mintage worldwide (a maximum number of 40000 coins were produced).

Scene Visa card login: check your balance online or by phone?

I have a Scotiabank Scene VISA credit card, but I am not a client of Scotiabank per say. I mean, I do not have a checking/saving account with this bank. The only thing that I have with Scotiabank is the Scene VISA card.
Scotiabank Scene VISA credit card (front)
Scotiabank Scene VISA credit card
When I first got this card, I was checking out the balance by phone. It was relatively easy to check the outstanding balance over the phone, but it was painful to perform other actions like listing past transactions. (There’s a section at the end of this post explaining how to consult the balance by phone).

Thankfully there’s a simple way to do this. You can sign in to Scotiabank online and mobile services using your Scene Visa card. 

In order to do this, you need to activate the online and mobile banking services in the following page:

In that page, you need to click the Activate Now button in order to enable these services. If for any reason you have an issue when doing the activation online, then you will have to go to a Scotiabank branch and ask for help.  It matters not that you aren’t a client of Scotiabank; if you have a Scene Visa card they will help you out.

An important tip: if in addition to your Scene Visa card you have a ScotiaCard, then you will have to activate the services using the ScotiaCard, NOT your Scene Visa card. 

On the other hand, if you ONLY have a Scene Visa credit card, then you can use it directly to activate the online and mobile services.

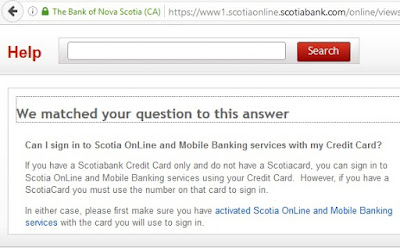
I don’t know why the guys at Scotiabank did this process so confusing; but that’s how it is. See the following images from the FAQ section at Scotiabank.

Can I sign in to Scotia OnLine and Mobile Banking services with my Credit Card?
Scotiabank - How do I register for online and mobile banking services?

Anyhow, once you have completed the activation, you can login using the same card used for the registration. You can login in the same link as before: 

That is all! I hope the post was useful :-) If it was, please show your appreciation clicking the Google+ button at the beginning of this post.

Annex: how to check the Scene Visa card balance by phone

The easiest way that I have found is to call the number in the back of your card. You will be calling an automated system, so a machine will be doing the talking to you.The number that appears in the back of my card is 1-800-387-6556 (for US/Canada calls). I guess you can use this number as well.

You simply have to enter your credit card number (16 digits in the front of your card) and home telephone number (10 digits) so that the system can authenticate you.

After this you just have to pick the proper option from the possibilities you are given. Don’t worry, it’s straightforward.

Just make sure to select the option that allows you to inquire your balance. In addition, you can request the list of transaction since your last statement. Again, a machine will be doing the talking and providing you with the transactions.

That’s it! You can get this done from your phone in 5 minutes. No need to talk to an agent and the system is available 24 hours a day, 7 days of the week. If you found this information helpful, I would appreciate if you click the Google+ button at the beginning of this post.

If you know other ways to check the Scotiabank Scene VISA credit card balance, share it with us in the comments section below. Thanks!

14k Gold Coin - 100th Anniversary of the Canadian Arctic Expedition (year 2013)

The Canadian Arctic  Expedition 1913-1916

On the antique celluloid, the light flickers. Sled dogs move silently across the Arctic tundra. A man perched on an ice floe surveys the horizon as teams of men and dogs prepare for ice-bound travel behind him. In the distance snow-capped mountains rise into the sky like jagged shards of ice.

In grainy photos, men stand alongside makeshift fences, before shelters made of skins and furs, in open ice fields, atop sleds packed with gear. Some smile; others stare silently into the lens, arms crossed, thoughts unfathomable.

These are only a few of the approximately 4,000 photographs and more than 2,700 metres of film capturing one of the twentieth century’s most exciting moments in exploration: the Canadian Arctic  Expedition.

In 1913, Canadian Prime Minister Sir Robert Borden commissioned an expedition, led by Manitoba-born ethnologist Vilhjalmur Stefansson, to explore and map the western Canadian Arctic. Stefansson and zoologist Rudolph Anderson had travelled through the Far North the previous decade. Knowing that there was a great deal of unexplored potential in the region, Stefansson planned to continue his earlier journey, but the Government of Canada, recognizing the importance of new sovereign territory, hosted the Expedition and broadened its mission significantly. A Northern Party led by Stefansson would undertake the mapping exercise while a Southern Party led by Anderson would explorer the geology, resources, and native inhabitants of the northern mainland.

Traveling by sea and despite significant hardships, the Northern Party covered thousands of kilometres, mapping land that even the local inhabitants had never seen. The Northern Party discovered four new islands and proved that some of the geography proposed by nineteenth century expeditions was erroneous.

The Southern Party completed the full mapping of the mainland and produced 14 volumes of scientific data as well as thousands of specimens and artefacts, opening up a new world of wonder for Canadians. Their findings included information about flora and fauna never before recorded, fossil samples, and more. Their cultural research familiarized the world for the first time with the culture and way of life of the Copper Inuit and the aboriginal peoples of the Northwest Territories, Yukon Territory, Alaska and Siberia. From these Aboriginal peoples – some of whom participated in the Expedition as guides and other assistants- they collected artistic artefacts, tools, knowledge, and thousands of photographs as well as extensive film footage.

The Expedition’s artefacts, photos, and recordings enabled researchers to introduce to the rest of the world cultures that had been virtually inaccessible until that time. The artefacts have also had a broad educational legacy, forming the basis of numerous educational programs and museum exhibits, and are an important pillar of the permanent National collections of the Canadian Museum of Nature and the Canadian Museum of Civilization.

14k Gold Coin - 100th Anniversary of the Canadian Arctic Expedition

This 100-dollar coin is certified to be 14-karat gold with a metal content of 12 grams and a diameter of 27 millimetres. In this design, Canadian artist Bonnie Ross depicts several key images representative of the Canadian Arctic Expedition, including a survey team atop an ice floe taking research measurements and, in the background a stylized map of the Canadian Arctic. The obverse features the effigy of Her Majesty Queen Elizabeth II by Susanna Blunt. 

14k Gold Coin - 100th Anniversary of the Canadian Arctic Expedition - Mintage 2500 (2013) [Front]
14k Gold Coin - 100th Anniversary of the Canadian Arctic Expedition - Mintage 2500 (2013) [Back]

Mintage/Tirage

0218/2500

Certificate of Authenticity

This proof quality 2013 $100 gold coin was authorized by the Government of Canada. It was expertly struck by the Royal Canadian Mint and has a limited mintage worldwide (a maximum number of 2500 coins were produced).

Proof Fine Silver Dollar - 100th Anniversary of the Canadian Arctic Expedition

This proof silver dollar is certified to be 99.99% pure silver with a diameter of 36.07 millimetres and a weight of 23.17 grams. Designed by Canadian artist Bonnie Ross, the reverse image draws on photography from the Canadian Arctic Expedition, depicting a group of three men aboard a dogsled, the waiting dog team before them listening for the command to move on across the Arctic tundra. The skyline and horizon behind this portrait are filled with stylized image of a compass. The obverse features the effigy of Her Majesty Queen Elizabeth II by Susanna Blunt.

Proof Fine Silver Dollar - 100th Anniversary of the Canadian Arctic Expedition - Mintage 40000 (2013) [Front]

Proof Fine Silver Dollar - 100th Anniversary of the Canadian Arctic Expedition - Mintage 40000 (2013) [Back]

Mintage/Tirage

12866/40000

Certificate of Authenticity

This 2013 silver dollar is proof quality and is authorized by the Goverment of Canada. The coin has been expertly struck by the Royal Canadian Mint and has a limited mintage worldwide (a maximum number of 40000 coins were produced).

How to open a checking account at ING DIRECT?

ING DIRECT (Canada) was re-branded (renamed) as Tangerine as of Tuesday April 8th, 2014.

For instructions about how to open a checking account at Tangerine go to the following up-to-date article: How to open a checking account at Tangerine?

Tangerine kept most of the things from ING DIRECT. In their own words: “We’re changing our name, but we’ll never change who we are”. From the customer’s perspective, it was mainly about changes in the names of the services (products) provided and the organization itself.

Here is a summary of the name changes (old account names to the left and the new names to the right of the -> symbol):
  • THRiVE Checking Account -> Tangerine Checking Account.
  • Investment Savings Account (ISA)  -> Tangerine Savings Account.
  • unmortgage ->Tangerine Mortgage.
  • ING DIRECT Streetwise Portfolio ->Tangerine Investment Funds.
  • Streetwise Balanced Income Portfolio ->Tangerine Balanced Income Portfolio
  • Streetwise Balanced Portfolio ->Tangerine Balanced Portfolio.
  • Streetwise Balanced Growth Portfolio -> Tangerine Balanced Growth Portfolio.
  • Streetwise Equity Growth Portfolio -> Tangerine Equity Growth Portfolio.
The only real change I see as a customer, is the about the access to ATM machines. In the times of  ING DIRECT, THE EXCHANGE  Network was used for free. This will continue to be free until September 30th, 2014. After this date, you won’t be able to access ATM machines THE EXCHANGE  Network for free. This will impact some people I guess.

Instead you could use the Scotiabank ABM Network (containing nearly 4000 machines) and the Tangerine ABMs (which allow you to withdraw US dollars) for free.

Tangerine (formerly ING DIRECT) is a great banking alternative to the traditional ones (RBC, TD, Scotiabank…).

With Tangerine (formerly ING DIRECT), you don’t pay monthly fees, you get interest even on your checking account…You won’t be disappointed. My advice: switch to Tangerine. For details click the following link: How to open a checking account at Tangerine?

Enabling TLang to handle more than 17 translations: a workaround for a regression bug in Delphi XE3

I recently had to localize a FireMonkey application and for that I aimed to use the TLang component. With TLang you can define a collection of native strings to be localized and the corresponding translations to a particular language. To my surprise the component was allowing to store a maximum of 17 translations for the whole application. So, what about the other strings that need localization?

It seems there’s a regression issue from Delphi XE2 to Delphi XE3 that is preventing TLang to store more than 17 translations. You can even find an entry for this in Embarcadero Quality Central, for which no workaround or fix has been provided up to this date.

I found a programmatic workaround for this issue. Basically, the native strings and the translations could be loaded from text files in which each line will have the form:

NativeString1=Translation1
NativeString2=Translation2
NativeString3=Translation3
…………
NativeStringN=TranslationN

You will need one file containing the native strings and the translations per language. These files can contain as many lines as you which (certainly more than 17). In order to load those files into an existing TLang component you can use the function below:

procedure LoadTranslationsFromFile(aLangCode: string; aFileName: string; aLang: TLang);
var
  Translations: TStrings;
begin
  if (aLangCode <> '') and
     (FileExists(aFileName)) and
     (Assigned(aLang)) then
  begin
    Translations:= TStringList.Create;
    Translations.LoadFromFile(aFileName);
    aLang.Resources.AddObject(aLangCode, Translations);
  end;
end;


For an example of how to use such function see below:

procedure TForm1.Button1Click(Sender: TObject);
begin
  LoadTranslationsFromFile('ES', 'C:\Temp\Lang_Test_ES.txt', Lang1);
  LoadTranslationsFromFile('EN', 'C:\Temp\Lang_Test_EN.txt', Lang1);
end;


Hopefully this bug will be fixed in the near future; but meanwhile you can use this workaround to handle more than 17 translations with the TLang component.